Wednesday, April 13, 2016

Step-by-Step Procedure #2: Configuring RPi to Connect with UbiDots & the IoT

Setting up RPi to Connect
with UbiDots for a People and/or Animal Counter


This tutorial is based upon information from the Ubidots blog post:
Building a People Counter with Raspberry Pi and Ubidots - by Agustin Pelaez


Make sure you have all the latest libraries for Python and Ubidots to run on your RPi:


Type and hit enter for each of the following commands in your RPi terminal window:
$ sudo apt-get update
$ sudo apt-get upgrade
$ sudo apt-get install python-setuptools
$ sudo easy_install pip
$ pip install ubidots


The last 2 installs allow Node-Red on your RPi to talk to UbiDots.com to monitor your sensor’s data.


Set up a free Ubidots account. Log into your new account using a browser on your RPi. That will make it easy to copy/paste your Ubidot keycodes into Nano (also called LXTerminal) where you’ve copied/pasted the code from


Click on your username in the upper-righthand corner of your Ubidots dashboard and click on Credentials in the dropdown menu. That will reveal your account’s API Key and Token - codes that you will need to copy/paste into the Python code on your RPi.


To generate a variable (your virtual monitor), you click on “Sources” in the top menu, then click on “Add Data Source”. I named mine “SDVT People Counter 1”. Click on your newly named Data Source and that will open up the “Add Variable” panel.


The Final step is to click on the info icon in your new variable; that will reveal your variable key code that you will also copy/paste into your Python code. In named my variable “People Counter”.
Next you will copy/paste the following code into the Nano application and then hit Ctrl + X to exit GNU Nano... it will prompt you to save the new Python script with a file name. Give the name: peoplecounter.py


from ubidots import ApiClient
import RPi.GPIO as GPIO
import time


GPIO.setmode(GPIO.BCM) ## The T-Cobbler breakout cable uses GPIO.BCM - see chart below
GPIO.setup(sscrscrot, GPIO.IN)


try:
   api = ApiClient("a21ebaf64e14d195c0044fcc3b9f6dab9d653af3") ## replace this number with your Api number from your ubidots account
   people = api.get_variable("5238cec3f91b282c7357a140") ## replace this number with your variable number from ubidots account
except:
   print "Couldn't connect to the API, check your Internet connection"
counter = 0
peoplecount = 0
while(1):
   presence = GPIO.input(7) ## change this number to match the GPIO number for your PIR sensor input... I used (26) for input pin on my T-Cobbler. See chart below to
   if(presence):
       peoplecount += 1
       presence = 0
       time.sleep(1.5) ## change this number to shorten or increase the lapse time between live PIR data recordings - how long your PIR is turned off and not sensing motion
   time.sleep(1)
   counter += 1
   if(counter==10):
       print peoplecount
       people.save_value({'value':peoplecount})
       counter = 0
       peoplecount = 0
T-Cobbler BCM numbering for GPIO pins


After you’ve saved your peoplecounter.py file, go to the RPi menu and open Python Idle under “Programming”.
Next, to to the file menu in Idle, choose Open File under the file menu, then browse to the “peoplecounter.py” file you saved in Nano.


Once you see “restart” in your Python shell, you should start to see the live PIR data being printed out. If you stand in front of your PIR for more than one second your should see it register your presence. The longer you stand there, the higher the number.


ubidots greater than.PNG
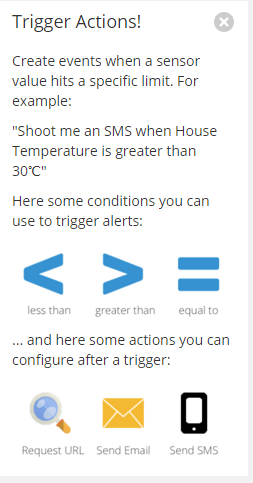
I also set up an “if this then that” Event in Ubidots “Events” page to send an email to me if the PIR records a figure greater than 6. You can also have SMS text to your phone.


You can also have a graph monitor your incoming data


For students doing the environmental science assignment: If you choose to use Ubidots or another IoT tool as your final project focus, please note that this tutorial is designed to provide a starting point for you to do your own remixed adaptation and research other IoT projects that collect scientific data.


Video Tutorials for Ubidots Setup


Raspberry Pi People and/or Animal Counter Part One - Ubidots IoT data Monitoring


Raspberry Pi People and/or Animal Counter Part Two - Email Alerts with Ubidots


Resource Links: ideas for scientific ways to use RPi, sensor, and IoT technology


Great forum posts about PIR and other sensors for collecting data on fish (cold blooded vs. warm blooded).


Step-by-Step Procedure #1: Starting a Node-Red Server on RPi

This tutorial is based upon information from the Ubidots blog post:


Equipment needed:
Raspberry Pi Model B+ or later with compatible micro USB power supply
Wireless keyboard with USB reciever
USB wi-fi adapter or Cat5 Ethernet cable
PIR sensor - please note that the PIR I used had 3 pins extending from the bottom of the sensor. The link for the Adafruit sensor has three-wire adapter that gives you more options for soldering longer wires and more flexibility for sensor placement (i.e. mounted on a ceiling).
HDMI Cable
LED monitor or TV with HDMI input
Internet Connection

Click on smaller thumbnail photos to enlarge.
Here is a picture of the PIR circuit that connects to the GPIO of the Raspberry Pi via the T-Cobbler breakout cable (the blue T shaped piece).


Close up of backside of the PIR sensor. The blue wire connects to the GND (ground) of the PIR and loops over to the negative rail on the side of the breadboard; this added grounding cable gives you the flexibility to have your PIR sensor at the far end of the breadboard for optimal clearance for sensing motion. The yellow wire connects to the 5.0V output from the T-Cobbler. The orange wire is the Out that connects to the #26 pin of the T-Cobbler that sends the sensor info to the GPIO on the RPi.

Once you have your circuit built, open up Node-Red under “Programming” in the RPi main menu.

Your Node-Red server console should open, showing the server IP address (URL) in the upper righthand corner of the console. Select and copy the URL.

Open up Midori or any other web browser and paste the Node-Red URL you copied into the address field of the browser. The Node-Red controller (graphic user interface) should load in your browser. This is where you will enter your “flow” to determine what your Node-Red server interacts with for the Internet of Things.

Now you are ready to start building your first Node-Red flow:
Video tutorial on Creating a Node-Red Flow to Collect Tweets (from around the globe).

For students doing the environmental science assignment: If you choose to use Node-Red as your final project focus, please note that this tutorial is designed to provide a starting point for you to do your own remixed adaptation and research other Node-Red projects that collect scientific data.